Kick in the Pants!
Oh my goodness... I stumbled upon this amazing blog while searching for methods of making new wood look old: Young House Love. I wish to live vicariously through them... ha ha. If only. Nah, if anything, their impeccable taste and incredible use of thrifty finds to furnish their beautiful home(s) is so inspiring! It got me thinking about all the stuff I wanted to do to our house when we bought it three years ago that we never got around to.
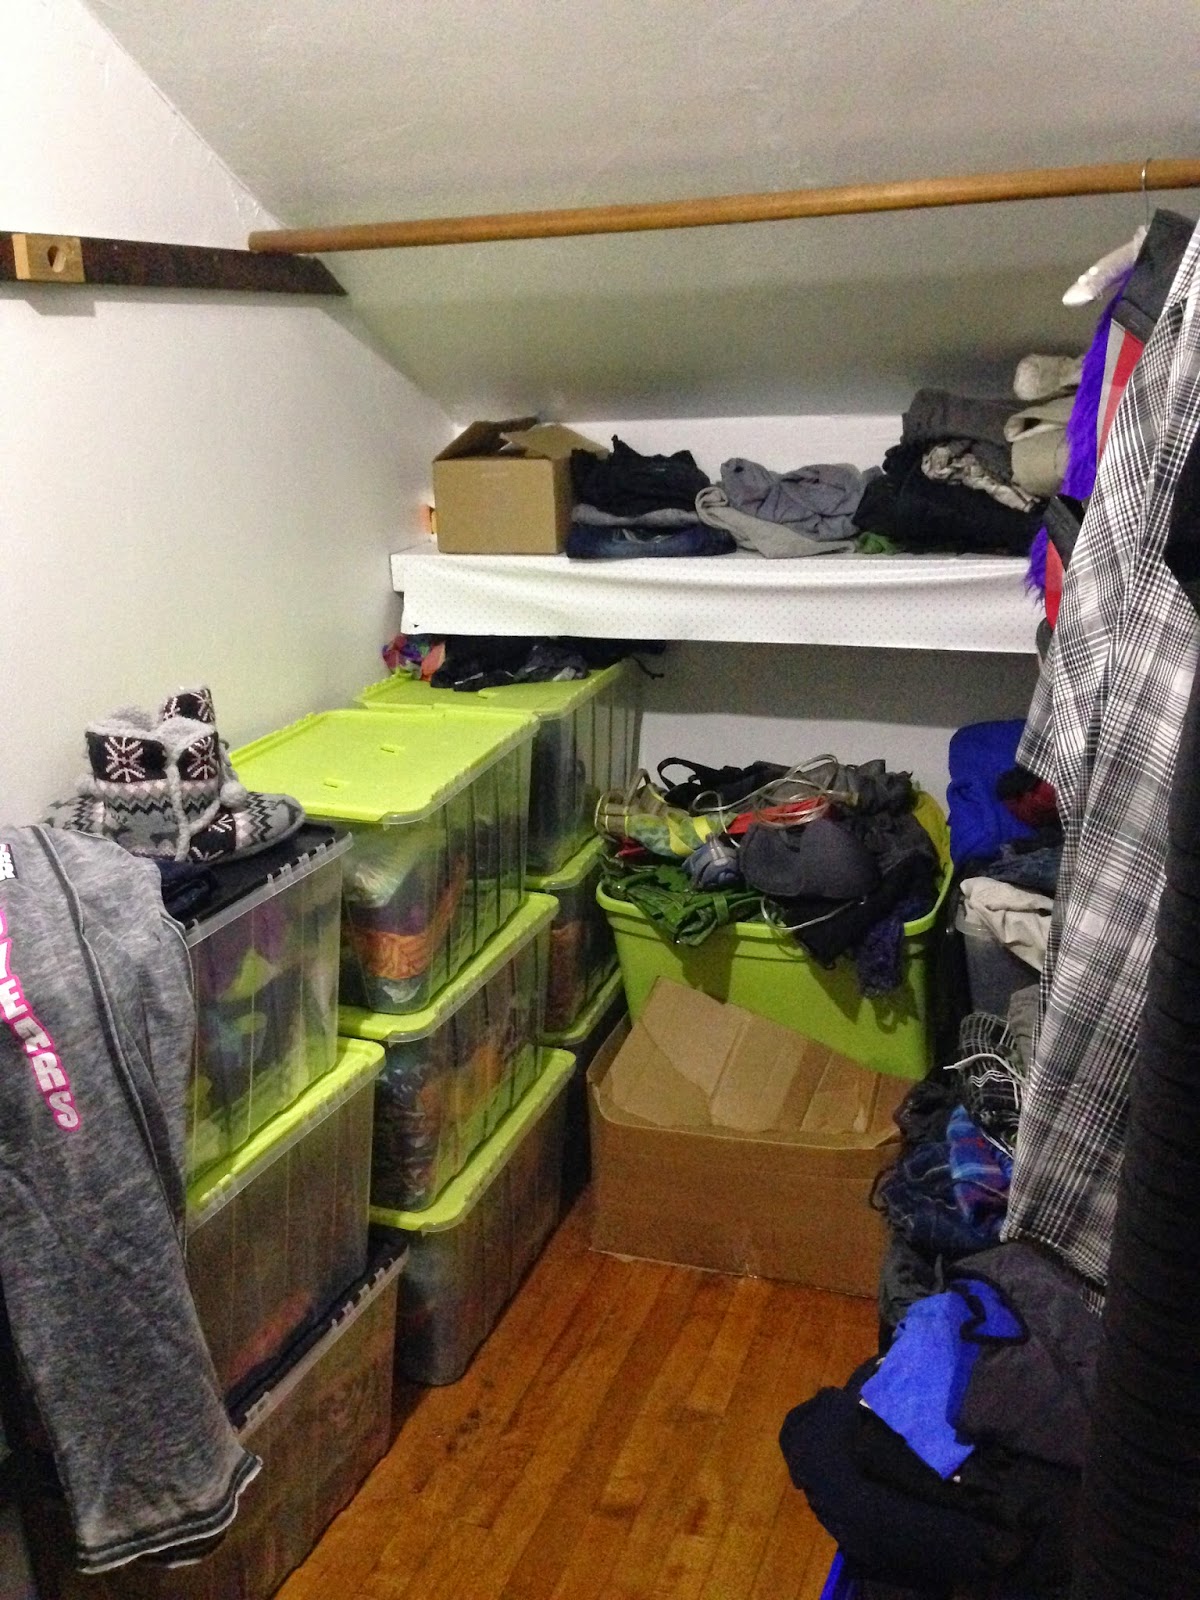
One of those things is our closet. It's a decent size- big enough to walk into, but there is literally no storage space. There's one lame shelf in the back (where the ceiling slopes down to about four and a half feet high) that's covered in nasty peeling sticky paper, and a dozen random hooks around the walls. Not the most useful... since we moved in, we've been living out of flip-top plastic boxes. We did finally get a decent dresser from Ikea a while back, and that holds all the little stuff like socks and undies, but it's definitely time for an overhaul.
I took a little time to sketch out what I'm hoping to create- just a couple quick Illustrator doodles. I want to use all the space we've got in this great little walk-in, so I plan to add square cubbies up to the ceiling, as well as in the "short corner".
Of course, the big wall will be for my stuff and the hubby can have the few cubbies in the corner. :) Ha ha. I also want to make a little jewelry counter in the short corner; I scoped out some granite remnants today and it looks promising! Affordable and gorgeous!
Along with the added storage, I hope to add a touch of fanciness to my morning routine. Our bedroom is light grey and a deep red, so I'd like to carry those colors into the closet as well. Such an elegant, romantic color, red.
On the list to do: paint the floor an espresso brownish black (we didn't do the closets when we refinished the hardwood floors), find a nice cheap rug, create a DIY ottoman, and re-purpose an ugly old light fixture from the ReStore into a classy chandelier.
Speaking of chandeliers, that's what I decided to start with! We found this late 80's gem at the ReStore for $15- and it had a yellow tag so it was actually 25% off. There were tons of options, but we chose this one for its small size. There's not a lot of head room in the closet, so we need to keep it low-profile. Hubby also preferred fewer candelabra bulbs (since there's a lack of energy-efficient options with these tiny bases), so we chose the one with five arms. There is a normal light socket inside that trumpet-shaped thing at the bottom, so most of the light will probably come from an LED bulb in there.
Taking the fixture apart was really easy. Everything just kind of screwed apart, and we were left with a shiny brass mini chandelier that would make an excellent flush-mount light.
Of course, brass doesn't cut it for me, so I decided to paint it hammered-finish red. Here is the chandelier hanging from a ladder in my makeshift paint booth in the garage. The sun shining through the plastic drop cloth kind of made it into a pretty little light box...
I'm going to have to get creative to make a shade for this puppy... there isn't a logical place to attach one in the normal way, so I think I'll rig something up with some pretty chain. Here's the stretchy, sparkly fabric I picked up to make the shade with, as well as the chain and some drop crystals I got at JoAnn's.
This is going to be an interesting lampshade... so I'll be sure to post some pictures of how I made it once I get it together. Stay tuned for more!
One of those things is our closet. It's a decent size- big enough to walk into, but there is literally no storage space. There's one lame shelf in the back (where the ceiling slopes down to about four and a half feet high) that's covered in nasty peeling sticky paper, and a dozen random hooks around the walls. Not the most useful... since we moved in, we've been living out of flip-top plastic boxes. We did finally get a decent dresser from Ikea a while back, and that holds all the little stuff like socks and undies, but it's definitely time for an overhaul.
I took a little time to sketch out what I'm hoping to create- just a couple quick Illustrator doodles. I want to use all the space we've got in this great little walk-in, so I plan to add square cubbies up to the ceiling, as well as in the "short corner".
Along with the added storage, I hope to add a touch of fanciness to my morning routine. Our bedroom is light grey and a deep red, so I'd like to carry those colors into the closet as well. Such an elegant, romantic color, red.
On the list to do: paint the floor an espresso brownish black (we didn't do the closets when we refinished the hardwood floors), find a nice cheap rug, create a DIY ottoman, and re-purpose an ugly old light fixture from the ReStore into a classy chandelier.
Speaking of chandeliers, that's what I decided to start with! We found this late 80's gem at the ReStore for $15- and it had a yellow tag so it was actually 25% off. There were tons of options, but we chose this one for its small size. There's not a lot of head room in the closet, so we need to keep it low-profile. Hubby also preferred fewer candelabra bulbs (since there's a lack of energy-efficient options with these tiny bases), so we chose the one with five arms. There is a normal light socket inside that trumpet-shaped thing at the bottom, so most of the light will probably come from an LED bulb in there.
Taking the fixture apart was really easy. Everything just kind of screwed apart, and we were left with a shiny brass mini chandelier that would make an excellent flush-mount light.
Of course, brass doesn't cut it for me, so I decided to paint it hammered-finish red. Here is the chandelier hanging from a ladder in my makeshift paint booth in the garage. The sun shining through the plastic drop cloth kind of made it into a pretty little light box...
I'm going to have to get creative to make a shade for this puppy... there isn't a logical place to attach one in the normal way, so I think I'll rig something up with some pretty chain. Here's the stretchy, sparkly fabric I picked up to make the shade with, as well as the chain and some drop crystals I got at JoAnn's.
This is going to be an interesting lampshade... so I'll be sure to post some pictures of how I made it once I get it together. Stay tuned for more!


Comments
Post a Comment