Posts

Showing posts from December, 2016

Quick & Simple Personalized Art Display

Image
Do your kiddos make more art at school than your fridge can handle? My nephew Liam is apparently a super-duper prolific artist, and his mom needed somewhere to hang all his masterpieces. I whipped up this neat little board out of an eight-foot piece of lumber, a few screws, some magnetic clips, paint, stain, glue, and a set of decorative letters. First, I cut the eight-foot piece of 1x8" lumber in half to make two four-foot pieces. I attached them together from the back side with two smaller pieces of scrap wood and screws. Sorry... I don't have a picture of that. The lumber was pre-sanded and nice and smooth (I got it at Menards; it comes wrapped up in plastic to protect it from dings and scratches), so I just took it outside and stained it a nice chestnut brown. Once the stain was dry, I brought the board in and laid out the clips evenly... then stuck them down with Gorilla Glue. I also dabbed some enamel model paint into the circular indents in the clips, just for

Woodland Critters Quilt(s)

Image
Woodland animals must be a really popular nursery theme these days! I've actually done two cuddly critter baby quilts in a row now... Knot Hole Gang My mother-in-law and I worked on the first one together; it was for her niece's baby girl Beatrix (Bee for short), so we used her favorite technique, fused & pieced applique. Whew! I had never done anything quite like this before, and I think I'll leave these ones to Deb from now on. Too tedious for me! We used a cute pattern from a book called Critter Hollow that Debbie had purchased, which includes several patterns for cute little chubby applique animals hanging out in a tree ( Brandywine Design ). We decided to go with the pattern called "Knot Hole Gang" so we could work on pieces separately.   Debbie and I met at My Favorite Quilt Shop to pick out fabrics, and we ended up with some really cute ones in a relatively gender-neutral palette. A nice bright, grassy green for the background, some pretty

Adopt Me Vests: Part 2

Image
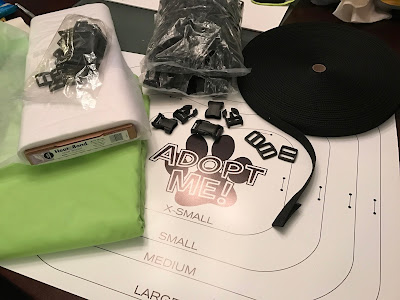
Holy cow has it been a busy past couple of weeks for me... I've been traveling for work quite a bit (which is unusual), so I got done what I could on these super cute doggy vests in between trips to Orlando and Dallas. Everything from Amazon.com arrived right away (yay, Prime!), which included the buckles, belting, and interfacing. I also picked up some cheap lime green fabric to make a sample so I could check my pattern. The fabric arrived a week or so later; all 12 yards of it! Four yards of turquoise, eight yards of lime green. I found the most efficient way to cut these out was to essentially cut four layers at once; a double thickness to get two vests, then another fold at the center of the vest. This ensures the vests are symmetrical, while also saving a ton of time and effort compared to cutting out the pieces individually. I had started out by tracing the patterns onto the fabric with a marker, but this seemed extra tedious. I ended up cutting the majority of th