Posts

Halloween Craft Night
Image
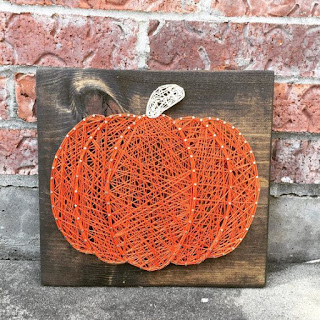
A few friends and I have decided to meet up for craft night on random Mondays. Our first session was Halloween-themed! I had been scouring Pinterest for cute ideas for weeks, and I finally decided on some string art, a giant googly-eye wreath and some beaded spiders... kind of like these: I knew the string art would take the most amount of time (I decided on four different ones... doh!), so I prepped the wood pieces the week prior to craft night. There were a bunch of pieces of 1x12" board hanging out in my basement for a while, which I probably bought to make something else out of but forgot about, so I grabbed those and brought them to work to cut into manageable pieces. After impressing some male coworkers with my table saw skills, I sanded the pieces up nice and smooth. Next step: color. I had decided on four different shaped objects for my string art: a pumpkin, a cat against a full moon, a ghost in a circle, and some bats. The pumpkin was obviously destine...

Yes, I can make this shirt fit!

Image
OK... so this t-shirt came up on my Facebook news feed a few weeks ago, and I just thought it was hilarious! Not only can I really drive a stick (helloooo, 6 speed Corvette!), but I'm the farthest from a witch as can be (I think...), so it's kinda funny. I ordered the shirt through ILoveApparel.com. It was $23 or something, so not really a deal, yet not outrageous. I thought it was cute so I got it anyways. It arrived about a week later, and honestly, I kind of expected better print quality. It's obvious that the design in heat-transferred on, as there is a clear outline of the rectangular sheet it was printed on. Oh well. At least it's a soft thermal transfer... I also thought I had ordered the women's fit tee, but I ended up with a regular manly t-shirt that was way too big. That's where this blog post comes in! I'm going to show you a simple way to make a big old baggy shirt into a cute fitted one! All it takes is a single cut and two seams... First...

A beautiful fall family session

Image
I visited one of my favorite portrait spots again last weekend with my friends and their little girl to do her 9 month pictures. Fall is such a great time to do portraits, with all the pretty colors and the cute sweaters... We've been doing portraits every three months or so, and it's amazing to see how much little Miss Livi changes every time I see her. We started when she was five days old (well, technically we did maternity photos first)... and this was nerve-wracking for me! I have never spent much time with newborns... or even babies. I was amazed they trusted me so much to just move her around and what not (babies are so fragile!!!). She was born right before Christmas, so we took the opportunity to do some holiday-themed pictures. I made this cute little elf hat the night before... Then we did some three month photos. These were slightly awkward because she couldn't really sit up on her own yet. We have a lot of supporting arms in the pho...

The fun just never stops!

Image
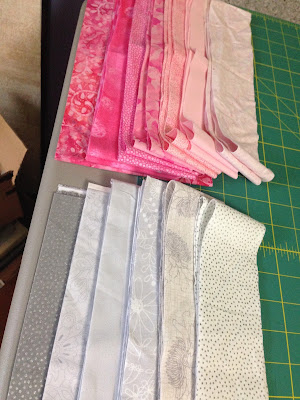
Yup! I started another quilt the other night. Another girl quilt, but with a more traditional color scheme this time (blush pink and grey) for my first baby niece. I absolutely love how the blue and green gradient quilt turned out for little Liam, so I thought I'd try my hand at mixing some prints again. I spent about an hour at JoAnn Fabrics matching shades of pink and grey, and came home with a quarter yard of 14 different fabrics, plus a larger piece of a pretty dusty pink print for the backing. As always, I eliminated one solid pink fabric because it ended up clashing when I got home... I think they must have special lights in the store that make everything look good together. I didn't really have a plan going into this quilt, but I knew I wanted to go simple with it. "Baby Butt" (as her big brother calls her) is due in October instead of December like I had originally thought, so I wanted to be sure I'd be able to get it done quickly. So far, that does...