My Fair Tiny Quilts
I spent the weekend working on my mini quilts for the fair, and they're turning out so cute!
First up, I got the giant applique snowflake quilt ready to go. I cut the fabrics down to about 34" square. I had purchased a yard of each, so I have a bit left over of each one for binding and hang tabs. I then applied the fusible (with paper) to the backside of the white and silver fabric and folded it up like I was cutting a paper snowflake. And then I got stuck.
I didn't want to just cut willy-nilly and end up with an ugly snowflake. I only had one shot to do it for real! So I practiced with some blue printer paper (and a paper scissors!). It's kind of hard to think about snowflakes in the middle of summer... I felt like I couldn't come up with anything creative!
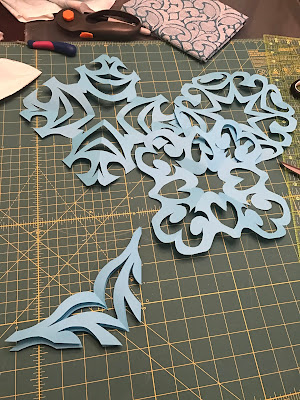
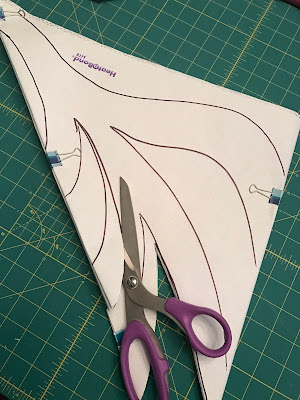
Once I landed on a design I liked, I folded the snowflake back up and drew the shapes onto the fusible backing. I should note here that I folded my fabric differently than Rob of Man Sewing did in his video. He folds his fabric in half and then into a square first, while I was always taught to fold on the diagonals. I'm not sure it makes a whole lot of difference, though, now that I think through it.

I felt like my stack of fabric was a little bit slippery, so I held the folds in place with binder clips while I cut. It was also much thicker than I anticipated! Eight layers of fabric and paper is tough to cut through, even with a big honkin' fabric shears! I did end up cutting a few of the sections out layer by layer, because I was worried that the holes on the further-in pieces would turn out a lot smaller than those on the outside layers. The handle of my scissors also chewed a chunk out of my finger... so that's fun.
The snowflake was then centered on the background fabric and pressed in place with a hot iron. I wish I had a larger pressing surface for this; trying to maneuver the loose, floppy snowflake over my tiny ironing board without shifting or getting wrinkled was tough.

All in all though, this was probably the fastest and easiest finished quilt top I've ever made! Well, maybe aside from the whole cloth one I did a while back. It's now sandwiched and ready to be quilted.

I did practice my free motion quilting though, and I think I'm finally confident enough to actually try it on a project! I'm super impressed how I was apparently able to absorb FMQ skills via YouTube Osmosis. Or something.

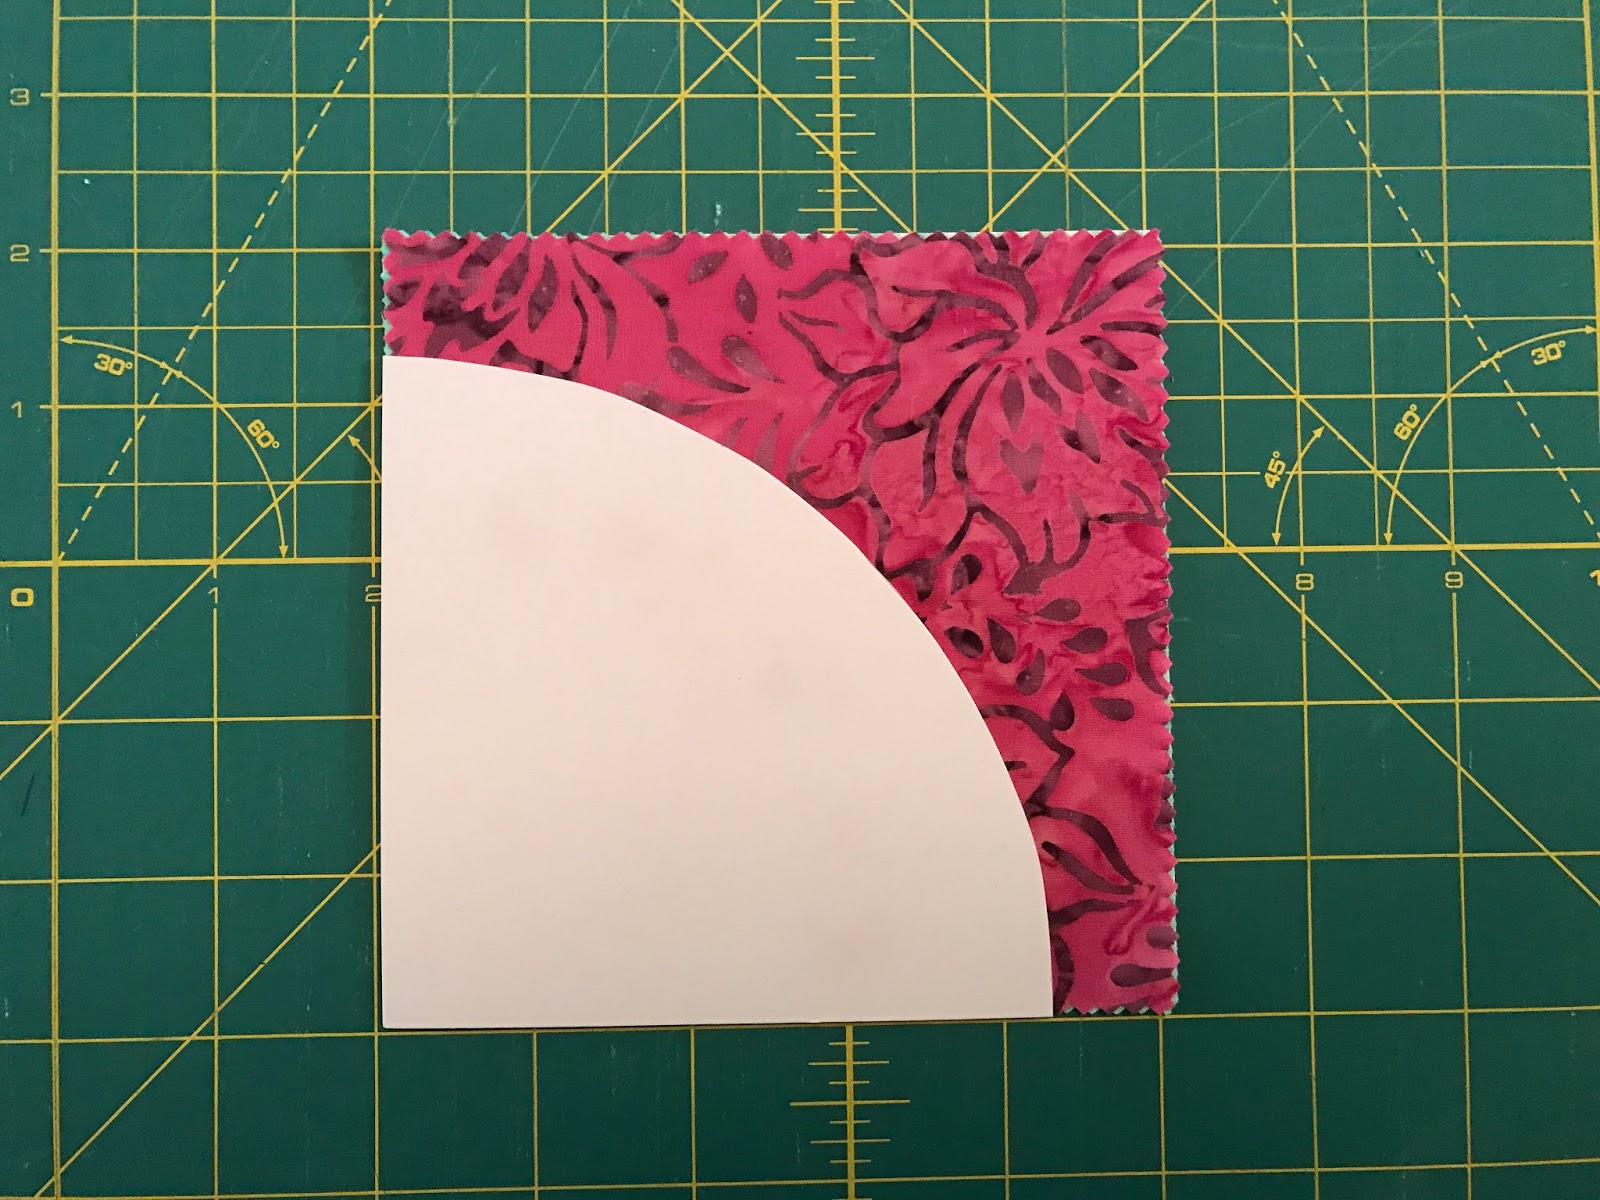
Next up, I took on some curved piecing. My acrylic template never got cut out at work (Pssh. People and their priorities. Lol!), so I winged it and cut one out of one of the little cardboard squares from my charm pack.
I used a few extra charm pieces to practice a bit. It wasn't looking too promising at first, but after putting together 8 or so squares I felt like they had improved enough to get started. I also experimented with a few different presser feet to find one that helped me line up the fabrics just right (my new-to-me sewing machine came with like three dozen different feet!).

I chose the charm pack from my collection that had pinks, purples, navy blues and aqua colors, and laid them out very similarly to how my inspiration quilt was laid out.

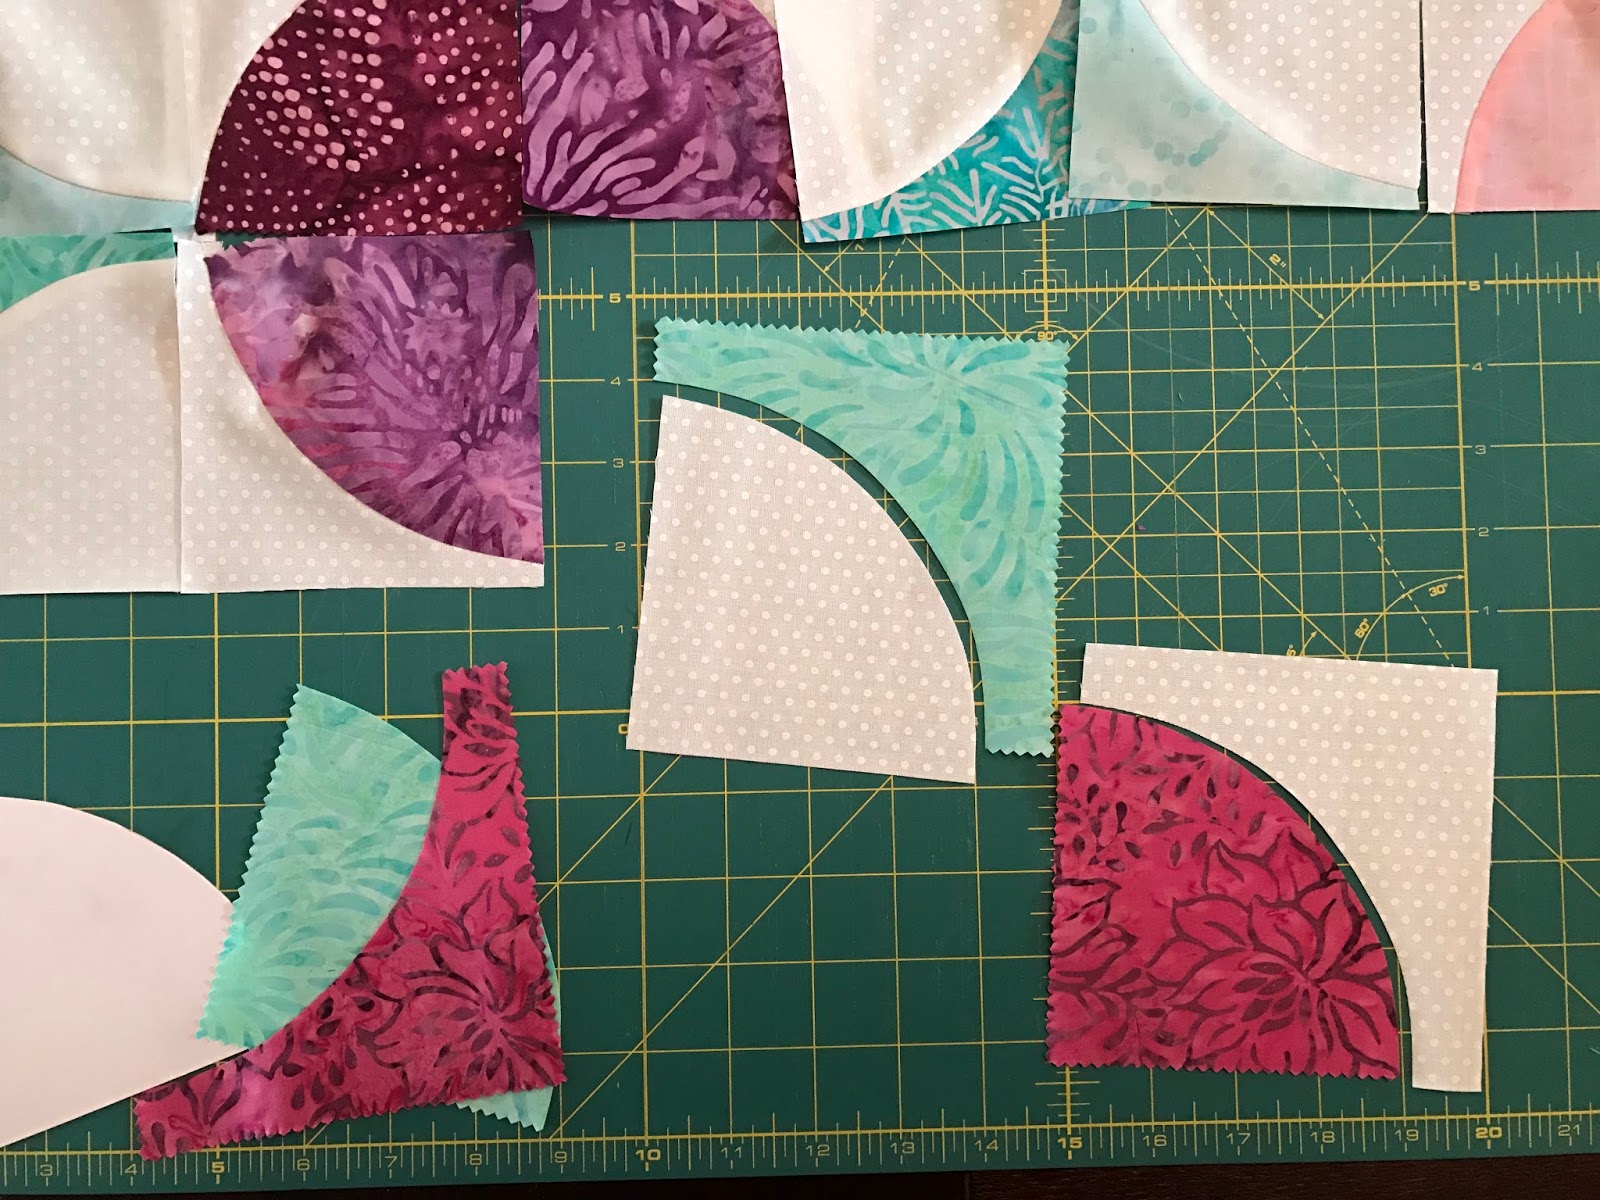
Then I began the cutting process. At first I was cutting two pieces at a time- one batik and one background fabric, and sewing both sets together starting with the one I didn't plan to use. Kind of a "warm up" I guess. Eventually I decided that it would go a lot faster if I cut three layers out and set the two pieces I didn't need aside; it not only saved time, but also background fabric! I wouldn't have had enough squares cut had I kept doing it the other way.
I did find that sewing a batik piece to the Robert Kaufman "Spot On" fabric was a bit odd. The batik was less stretchy, so the white pieces tended to get stretched out and wonky no matter how gently I fed them through the machine. Two batik pieces, however, went together like PB & J.
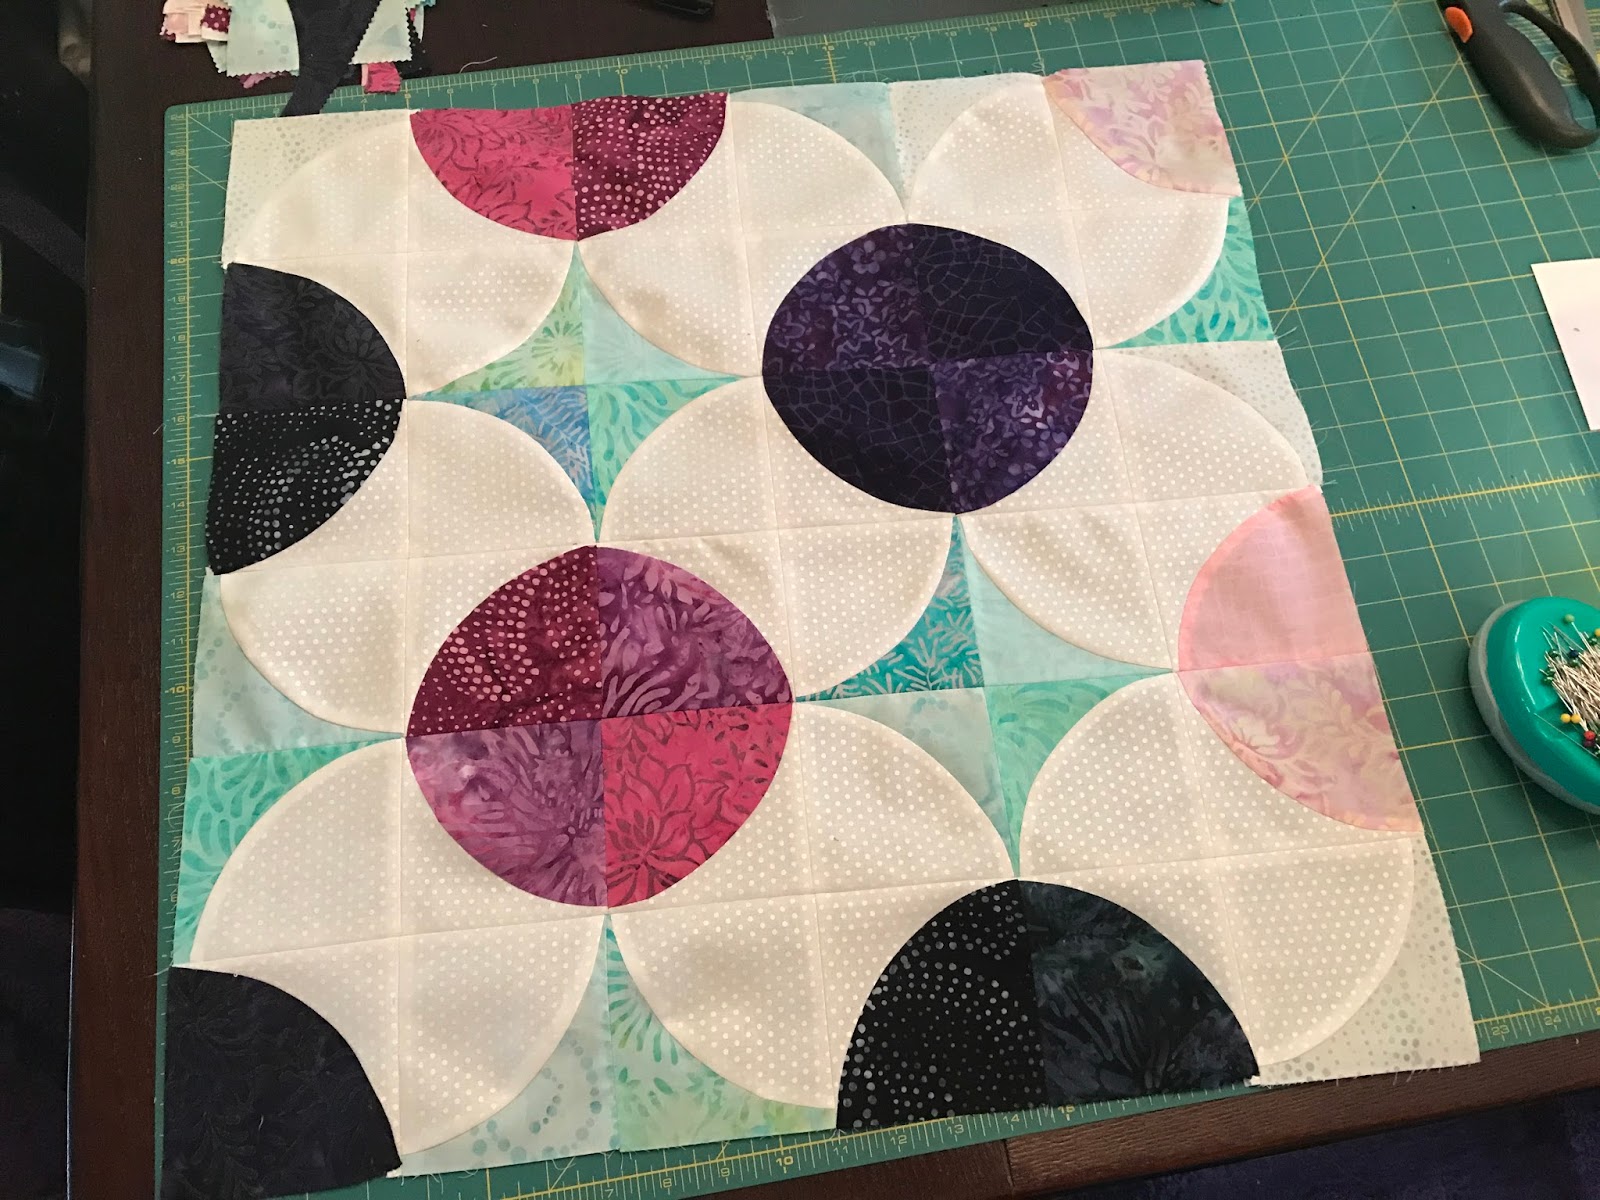
Eventually I got my cute little 22" square quilt top finished. The circles aren't exactly round, but I think it turned out great! I love the color layout... and I think some FMQ will really enhance the layered effect that's happening here.

And I have a bunch of leftovers to make a second mini quilt with! Yay, twofers!

If I were to do this again, I'd add another 1/4" to the circle template; my finished pieces had to be trimmed down quite a bit to make the points "disappear" into the circles. I'd probably also use bigger squares to start! I really want to do one of these in shades of grey and rusty orange and red for my living room... only quite a bit bigger!
First up, I got the giant applique snowflake quilt ready to go. I cut the fabrics down to about 34" square. I had purchased a yard of each, so I have a bit left over of each one for binding and hang tabs. I then applied the fusible (with paper) to the backside of the white and silver fabric and folded it up like I was cutting a paper snowflake. And then I got stuck.
I didn't want to just cut willy-nilly and end up with an ugly snowflake. I only had one shot to do it for real! So I practiced with some blue printer paper (and a paper scissors!). It's kind of hard to think about snowflakes in the middle of summer... I felt like I couldn't come up with anything creative!

Once I landed on a design I liked, I folded the snowflake back up and drew the shapes onto the fusible backing. I should note here that I folded my fabric differently than Rob of Man Sewing did in his video. He folds his fabric in half and then into a square first, while I was always taught to fold on the diagonals. I'm not sure it makes a whole lot of difference, though, now that I think through it.

I felt like my stack of fabric was a little bit slippery, so I held the folds in place with binder clips while I cut. It was also much thicker than I anticipated! Eight layers of fabric and paper is tough to cut through, even with a big honkin' fabric shears! I did end up cutting a few of the sections out layer by layer, because I was worried that the holes on the further-in pieces would turn out a lot smaller than those on the outside layers. The handle of my scissors also chewed a chunk out of my finger... so that's fun.

The snowflake was then centered on the background fabric and pressed in place with a hot iron. I wish I had a larger pressing surface for this; trying to maneuver the loose, floppy snowflake over my tiny ironing board without shifting or getting wrinkled was tough.

All in all though, this was probably the fastest and easiest finished quilt top I've ever made! Well, maybe aside from the whole cloth one I did a while back. It's now sandwiched and ready to be quilted.

I did practice my free motion quilting though, and I think I'm finally confident enough to actually try it on a project! I'm super impressed how I was apparently able to absorb FMQ skills via YouTube Osmosis. Or something.

 |
| I'm just so impressed with myself... |
Next up, I took on some curved piecing. My acrylic template never got cut out at work (Pssh. People and their priorities. Lol!), so I winged it and cut one out of one of the little cardboard squares from my charm pack.
I used a few extra charm pieces to practice a bit. It wasn't looking too promising at first, but after putting together 8 or so squares I felt like they had improved enough to get started. I also experimented with a few different presser feet to find one that helped me line up the fabrics just right (my new-to-me sewing machine came with like three dozen different feet!).

I chose the charm pack from my collection that had pinks, purples, navy blues and aqua colors, and laid them out very similarly to how my inspiration quilt was laid out.

 |
| Inspiration image |
Then I began the cutting process. At first I was cutting two pieces at a time- one batik and one background fabric, and sewing both sets together starting with the one I didn't plan to use. Kind of a "warm up" I guess. Eventually I decided that it would go a lot faster if I cut three layers out and set the two pieces I didn't need aside; it not only saved time, but also background fabric! I wouldn't have had enough squares cut had I kept doing it the other way.
 |
| The original method. |
 |
| The smarter method... |
 |
| Stack of 3... |
 |
| Cut once... |
 |
| Get two, set extras aside. |
I did find that sewing a batik piece to the Robert Kaufman "Spot On" fabric was a bit odd. The batik was less stretchy, so the white pieces tended to get stretched out and wonky no matter how gently I fed them through the machine. Two batik pieces, however, went together like PB & J.
Eventually I got my cute little 22" square quilt top finished. The circles aren't exactly round, but I think it turned out great! I love the color layout... and I think some FMQ will really enhance the layered effect that's happening here.
And I have a bunch of leftovers to make a second mini quilt with! Yay, twofers!

If I were to do this again, I'd add another 1/4" to the circle template; my finished pieces had to be trimmed down quite a bit to make the points "disappear" into the circles. I'd probably also use bigger squares to start! I really want to do one of these in shades of grey and rusty orange and red for my living room... only quite a bit bigger!

Comments
Post a Comment