Oh, Baby! Snuggly Swaddle Pocket
This is a continuation of a previous post- Oh, Baby!
TO RECAP: my husband's best friend and his wife didn't waste any time in becoming parents-to-be after their wedding last May! The baby shower was a few weekends ago, and I whipped together a few little gifts to tide me over until my mystery quilt-along quilt for the baby is finished.
To make these swaddle pockets (no clue what these are actually called... just swaddles?), I did a quick Pinterest search and found a cute free pattern. It was kind of a weird puzzle to assemble from the multiple-page printout, but I finally got it together... and it looks like it might be a bit large for a newborn? I'm not sure... maybe not.

I chose to make two of these; one out of the dark polka dot print with a mint green flannel lining, and one out of the minty triangle print with a grey flannel lining.
I followed the directions in the pattern to construct the "snugglers", and I found it lacked visuals to really explain the process. I'm hoping this isn't the full pattern from the book- I'd be a little disappointed if it were. Anyways... I think I got it figured out for the most part.
I started by cutting out the fabric pieces. The pattern says you need a full yard of fabric for the outer shell, but I barely used half that with some strategic folding and pattern placement. Yay for leftovers!


TO RECAP: my husband's best friend and his wife didn't waste any time in becoming parents-to-be after their wedding last May! The baby shower was a few weekends ago, and I whipped together a few little gifts to tide me over until my mystery quilt-along quilt for the baby is finished.
The Snuggly Swaddle Pocket
To make these swaddle pockets (no clue what these are actually called... just swaddles?), I did a quick Pinterest search and found a cute free pattern. It was kind of a weird puzzle to assemble from the multiple-page printout, but I finally got it together... and it looks like it might be a bit large for a newborn? I'm not sure... maybe not.

I chose to make two of these; one out of the dark polka dot print with a mint green flannel lining, and one out of the minty triangle print with a grey flannel lining.
I followed the directions in the pattern to construct the "snugglers", and I found it lacked visuals to really explain the process. I'm hoping this isn't the full pattern from the book- I'd be a little disappointed if it were. Anyways... I think I got it figured out for the most part.
I started by cutting out the fabric pieces. The pattern says you need a full yard of fabric for the outer shell, but I barely used half that with some strategic folding and pattern placement. Yay for leftovers!
 |
| I folded the fabric opposite of how it comes off the bolt to get the most out of it. |
 |
| After the first piece was cut... |
 |
| Cutting the second piece from the leftovers. |
I cut out the flannel lining the same way, opening the fabric and folding it just to the size needed.

Making the darts in all four pieces was relatively straight-forward.
 |
| Mark the darts... |
 |
| Fold and pin... |
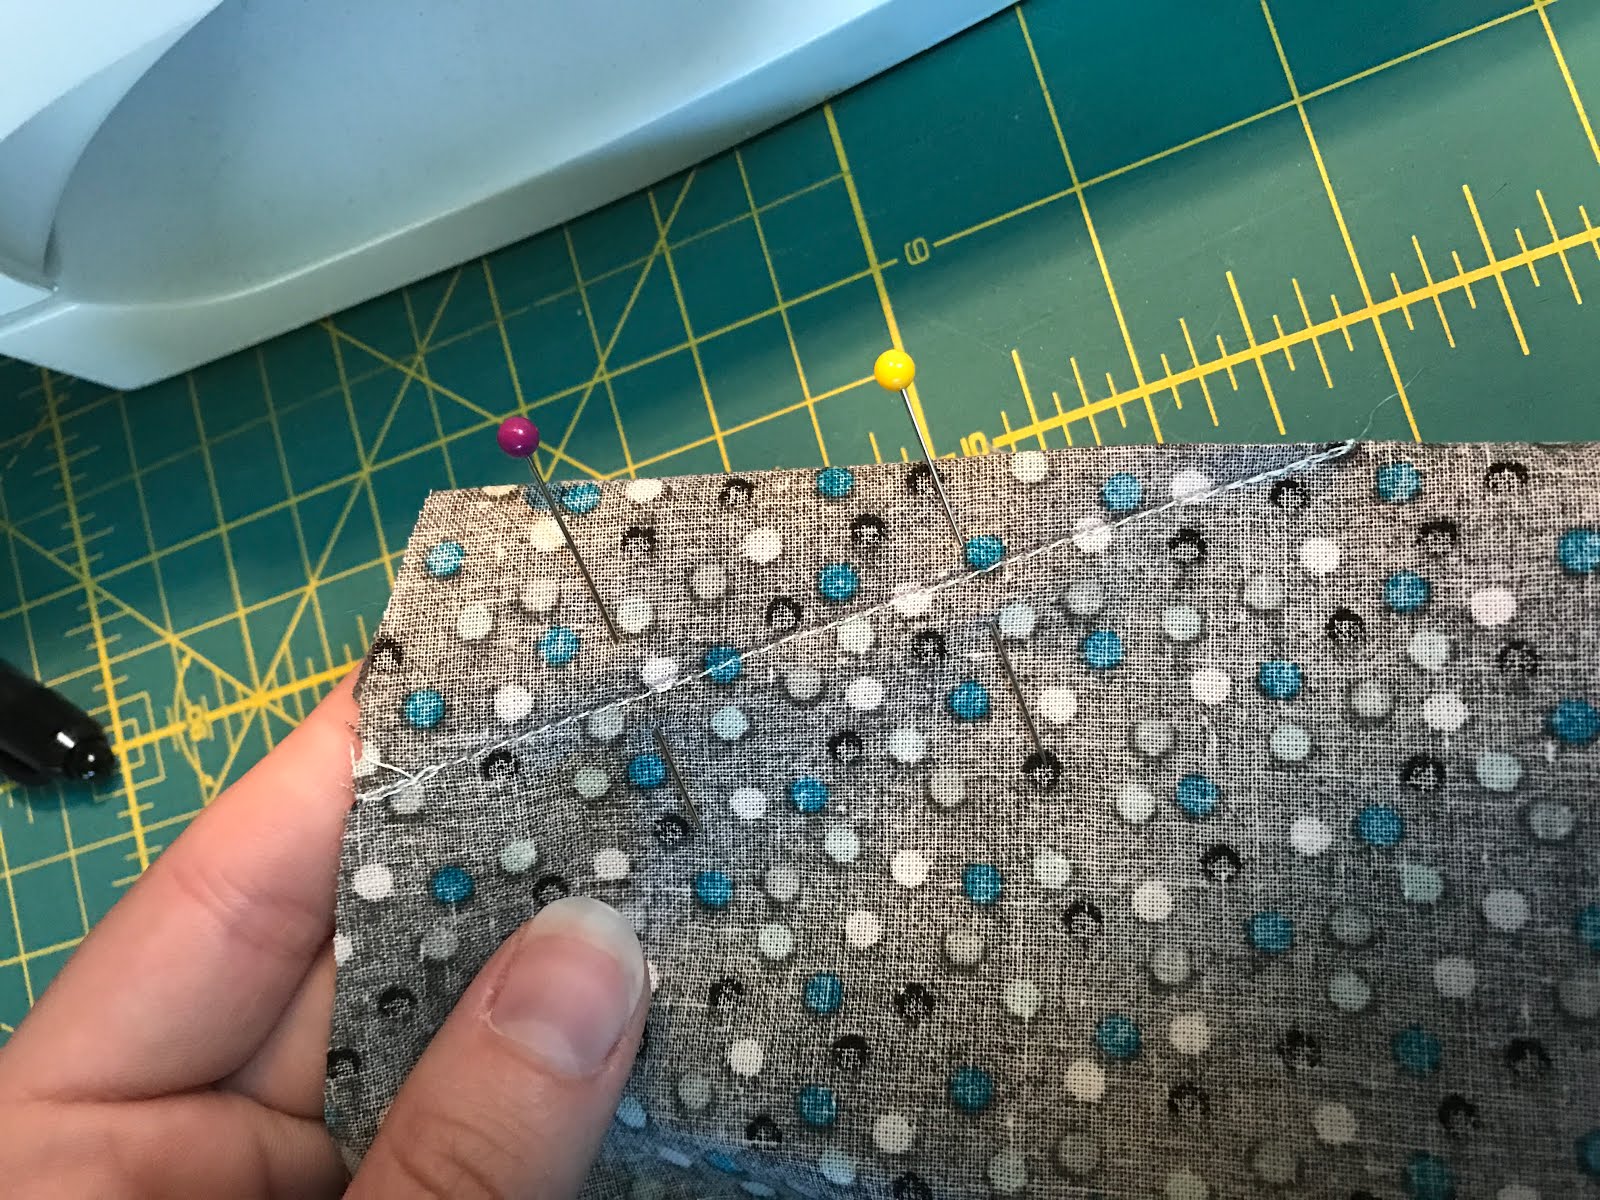 |
| Sew... |
 |
| Trim to 1/4" and press open. |
I then pinned the footie pockets to the main pieces around the bottom curves, right sides together, for both the outer shell and the lining.

This is where the pattern got a little... unclear? It said to sew "to the marks", but I couldn't find any marks on the pattern. Unless they were referring to the clip marks in the curves of the wrap arms? That's what I went with. Then it said to trim all seam allowances to 1/4"... to which I ask, why not just make the pattern a tad smaller and sew them that way? Perhaps this is normal in garment construction (I don't follow patterns too often).


The next step was to insert the outer shell into the flannel lining, right sides together, and sew around the raw edges. It said to leave a 3" opening in one "armpit". OK, no problem.

It also says to "ease your way around the corners where the pocket and main piece meet". What? I must have done something wrong (I need to learn how to "ease"?), because when I turned this puppy right side out, those corners looked pretty funked up. I've got to figure out how to fix that, because it sure is weird and bulky. Ha ha.
 |
| ??? Perhaps it just needs some clipping in there? |
Fortunately, the flaps cover up the weirdness in case I can't get it worked out all the way. Here's the snuggly cocoon thing before adding the Velcro (and a baby).

A few days later, I marked the placement of the Velcro strips and sewed them in place. Then I repeated the whole process again and made a cute minty green version!


Looks pretty close to the Target version on the registry, right? This really isn't a cost-saving exercise, but it sure was educational! And honestly, I think a customized, hand-made gift is so much more meaningful than a mass-produced, off-the-shelf one any day.


Looks pretty close to the Target version on the registry, right? This really isn't a cost-saving exercise, but it sure was educational! And honestly, I think a customized, hand-made gift is so much more meaningful than a mass-produced, off-the-shelf one any day.


Comments
Post a Comment