Finally! After six years of living out of Rubbermaid containers, I'm getting my grown-up closet!
 |
| Yikes! What a mess! |
 |
| Buh-bye, flip-top bins! |
Originally I wanted to create a bunch of custom-built cubbies out of wood, so I'd been saving up Home Depot gift cards, hoping to accumulate enough to buy a radial arm/cross cut saw. I might still get one, but I think the solution I came up with recently is super cool and unique, and will require a lot less cutting, gluing and nailing. It will also provide me with a bit of space to hang some stuff and display my folded clothes neatly... I'm so excited!!
I've been listening to a ton of podcasts from Chalene Johnson lately (#addicted #girlcrush), and
this one really got me energized to get moving on this project. She mentions in there somewhere that you want your closet to look like an expensive boutique so you're excited to wear your clothes... and that's my goal!
My hubby has been into the modern industrial/steam punk look lately (he's been dreaming of opening a funky brew pub for a while now), so I thought maybe I'd test my "plumbing" skills and put together a closet system using steel pipe and wood.... kind of like some of these examples from Pinterest:
 |
| $1700!! Ours will definitely NOT be that much... |
I like this option because it's really flexible; our closet is large enough to walk into, but the slanted ceilings make conventional closet organization systems out of the question. With the steel pipe concept, I can make each shelf exactly the height it needs to be with very little extra effort.
I'm not going to lie... figuring out how many pipes and fittings of each size I needed was kind of a hassle! I ended up doing a full-size mock up in Illustrator and creating a 1:1 scale shape for each piece, then shoving them around and adjusting as needed to fit around the window and down the slanted ceiling. I did front and side profiles to make sure all the measurements worked out.
 |
| Front profile |
 |
| Side construction profile |
I then drew in the wood shelves to fit my supporting pipe structures. I plan to cut lengths of 2x12" appearance pine (nominal size of 1.5x11.25"- that's important to note while designing!), stain them black to match our IKEA dresser, drill 1.125" holes in them with a Forstner bit, and assemble the shelves starting from the bottom.
The shelving units will be attached with steel pipe flanges, secured with toggle bolts in the walls and screws in the floor.
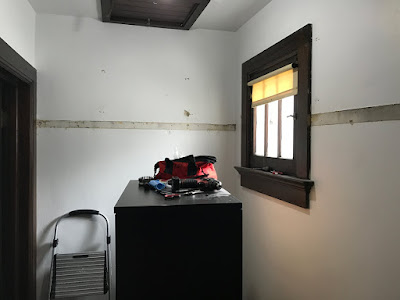
But, before going gung-ho on the shelving units, the closet needed to be prepped. I got all our stuff out (except the dresser... it's still full and kind of heavy) and started yanking the old pointless fixtures out. I suppose in 1916 when the house was built, 16 hooks was enough for an entire wardrobe... but that's just not practical anymore. We have a lot of STUFF! Much of which went to Goodwill last weekend...
I realized that our lathe and plaster walls are actually quite delicate, and thus needed to patch a few dents I created with the pry bar. Oops! It is definitely not the first time these walls have been patched up... but I actually think the texture of all the layers of patching is kind of charming, especially with with industrial vibe we're going for.
Paint came next! I started with a light grey... I thought it was the same color that I had used in our bedroom, but it turns out it was the slightly darker, cooler shade from our den. No biggie. It actually looks like concrete on the walls, which I love.
 |
| How about that pretty window without the shelf and ugly shade! |
I did have to run to Home Depot for a new can of red paint; the stuff we used for the accent walls in the bedroom was really thick and glorpy, and I didn't want to risk making a huge ugly mess. The colors don't match exactly, since HD has changed their formulas since five years ago, but I think after we get some warmer temperature light bulbs in there it won't make much of a difference. After two coats of paint, it's starting to come together!
It looks like the 11% rebate sale is on again at Menard's, so we'll be ordering all the pipe and fittings and other stuff to finish this up tonight! Stay tuned to see how it turns out. There will even be a custom light fixture involved... NOT the one I started
years ago! ;)


Comments
Post a Comment