Posts

Crocheted Baby Blanket

Image
So, here are the baby blanket photos I promised months ago... finally! This thing took me nine months to finish- the same time it takes to actually make a baby! Overall, I think it turned out great. I love the pattern and the colors, and it was really simple to do. Using a bigger hook would have made it go much faster, especially in the double crochet stitch I used. I purchased the yarn online from KnitPicks; it's CotLin, a cotton/linen blend that's really soft and easy to work with. I ended up using a lot more than I expected- I didn't really keep track, but I must have used at least 4 balls of the lime green (which isn't available anymore- glad I ordered more when I did!), maybe 7 of the surf blue, and 11 of the coffee brown. Basically, I started with a double-crocheted square about 8 inches by 8 inches. After the square was finished, I picked up stitches all the way around it and began DC in the round. I did two DC rows of each color to transition into the n...

YARNations!

Image
I wanted to create something quick, easy and cute for a craft sale I participated in last month... and who doesn't love flowers! I called them Yarnations- a combo of yarn and carnation.  I had been exploring the concept described in this TED talk about hyperbolic crochet, and I thought the technique would work out well for flowers. It's a simple process; you simply SC twice into every third stitch, which creates exponential growth.  The flowers are actually really simple to make. Here's the pattern: You'll need a small amount of a floral-colored yarn, and an even smaller amount of a leafy green yarn. Gauge doesn't matter... use a smaller hook for smaller flowers and a larger hook for larger flowers. You'll also need a needle and some thread, as well as pin backs, hair pins, or whatever else you'd like to attach to the back to make the flowers wearable.  Flower Chain 16 Row 1: Skip first chain stitch, *SC, SC, 2 SC in third st...

A Turtle's Journey

Image
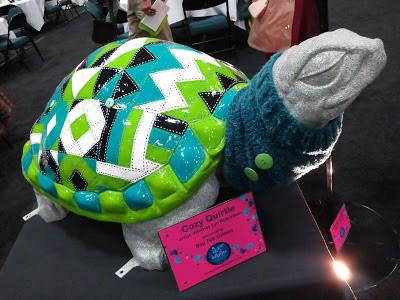
Way back in January, I brought home an unfinished fiberglass resin turtle. His destiny was to become a beautiful art piece. My turtle was part of a lager herd of 29 creatures that would be transformed, displayed and eventually auctioned off to raise money for the Einstein Project , a local organization that supplies area elementary school classrooms with hands-on science projects at no cost to the schools or children. A couple months ago (wow, I'm a bit behind on my posts!), my little buddy made me proud! He sold for $2200 at the auction, which is enough to broaden the scientific minds of hundreds of children! My Cozy Quirtle made quite a journey through his creation process. We think he may have been popped out of his mold too early, because he had many deformities that needed to be reconstructed. His nose and mouth were squashed, and many of his fine details were muddled. To solve this, I applied five pounds of Magic Sculpt epoxy clay to the form, building up any areas...

Sunshine Kitties...

Image
I love those days when I wake up and the sun is shining through the windows... it just makes me feel all warm and fuzzy inside. I think my cats enjoy those days, too. On one particular Saturday morning, I woke up to find Spud and Scooter sprawling all over the floor of my craft room, each kitty tucked into his own little square of light shining through the windows. I just couldn't resist joining them on the floor... with my camera. Black cats are pretty hard to take pictures of. Shadows don't really show up on them, so unless the light is really bright, they turn out looking like black blobs. Scooter doesn't really enjoy getting his picture taken either...  

Upcycled Wall Sculpture

Image
Several years ago, when I still lived with my parents, my mom ordered a funky table from a catalog. It was shipped in a box with a wide variety of large Styrofoam sheets and blocks. It seemed like such a waste to throw them away- we all know that Styrofoam doesn't break down and decompose in a landfill, and is thus not very good for the earth. My mom and I decided to create a sculpture with them. We chose several different colors and patterns of fabric to wrap the blocks with, which was pretty much just like wrapping a gift. We glued and pinned the fabric in place with floral pins. Once the blocks were wrapped, we laid them out in the configuration we wanted, then glued and pinned them together. Of course, I was probably 12 or so when we made this, so the color scheme is quite bright and juvenile. We chose a lot of lime green to go with the awesome green shag carpet that was in my bedroom. This could be done in any color scheme to compliment any room... The finished s...

What a crappy idea!

Image
I work for a fantastic company, and our CEO is not only a great businessman, but he's also a really cool guy. And he's obsessed with poop jokes. So naturally, as his 35 year anniversary with the company (and the company's 35th birthday) approached, HR enlisted my help for a surprise that would knock his dirty little socks off... and here it is. Poop cupcakes! Kind of gross, I know, but our fearless leader will gobble them up, even if no one else will touch them. They actually smell really good- I used a variety of frostings to create diverse poopy, including triple fudge chunk, coconut pecan (which looks disgusting), peanut butter, and caramel. I could have sworn that my mom had used butterscotch frosting on a similarly themed cake a few years back, but I couldn't find it anywhere. Instead, I used white frosting mixed with these nifty little packets of caramel flavoring- I didn't even know they made such a thing! The cupcakes were topped off with plastic flie...

Engagement Photos!

Image
A couple of weekends ago, I did some engagement photos for a friend and her new fiancĂ©. I'm not normally a portrait kind of photographer, but I think we got some good ones of this cute pair! We started off our photo hunt with a random piano I had seen in a field next to a friend's house. I later learned that this field is owned by a photographer... that would explain my weird urge to take pictures in it! After playing with the piano, we hopped in the car and ended up at a lakeside park with lots of trees and rocky cliffs. After some goofing around on the playground, we captured this adorable moment by one of the Lord of the Rings-esque rock stairways.  The pair stopped into a phone booth to transform themselves into a super-couple and we headed to another nearby park for some more fun. After a few attempts at flying off a park bench, we decided that simply looking to the sky was probably a safer option. This particular shot gave me the chance to play around w...

Apple Cider Season!

Image
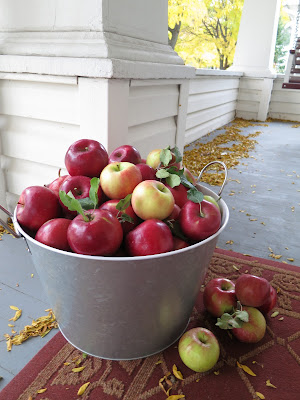
I've never canned anything in my life, but we went apple picking last weekend and it was so much fun, we started exploring what we could do with lots and lots of apples. We decided to try our hands at making cider- I've been craving it for a month now and couldn't find any of the real stuff at the store, so it seemed perfect. Today, we went out to our favorite local orchard and ended up picking 32 pounds of sweet, crisp apples- and it only cost us $18! We got a mixture of red delicious, Ida reds and another sweet, tangy variety we couldn't identify. Add those to our honeycrisps from last weekend, and we've got a great mix to play with! According to several recipes I found online, all it takes is a big pot with about 4 inches of water in the bottom and cored and cut up apples, put on to boil until they're soft. I think we're going to add some spices to make the cider a little more seasonal and festive- maybe cinnamon, nutmeg and cloves. Then, once the app...

Craft Fever!

Image
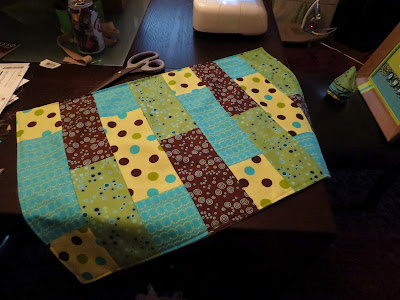
So, I whipped up some fun little baby boy gifts for a good friend's baby shower last weekend, and now I've got craft fever! It's been so long since I had the free time to do little projects (wedding planning takes a lot of effort), that I've forgotten how satisfying finishing a project and seeing it bring joy to the lives of others really is! Here are some photos of the cute gifts I made for my soon-to-be-new-mommy friend and her baby boy: First is a changing mat. Not really necessary, but cute none the less! I love how the "subway tile" pattern turned out, and it only took me about an hour to make, start to finish! I really just made it because I had leftover fabric from this next item... wait for it... Pee pee tee pees! A must for new parents who may not be the quickest at changing little boys' diapers... I've heard they like to become little fire hoses! These adorable soft fabric cones are placed over the... well, you know... to stop a f...